


|
Do-It-Yourself Clear Corners for the Solara Steven Chung Tools needed: Flathead screwdriver Philips screwdriver Pliers Silicone sealant/caulking Instructions: 1. Pop the hood. 2. Using the Philips screwdriver, remove the screw holding down the corner lamp to the chassis (located at the front left and right corners of the engine bay). 3. Remove corner lamp by sliding it towards the front of the vehicle. 4. Remove the bulb connector by turning it counter-clockwise. 5. Clean off dirt and place on working surface. 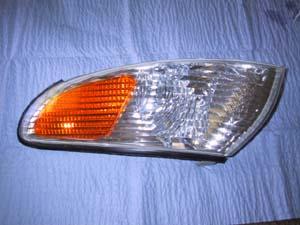 6. Separate the rubber lining from the plastic. Careful not to tear it. 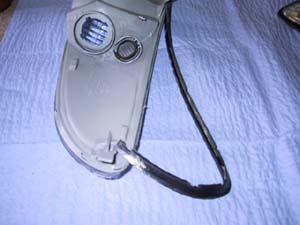 7. Using the flathead screwdriver, begin separating the clear and gray plastic pieces starting at the bottom of the corner lamp that's closer to the amber piece. 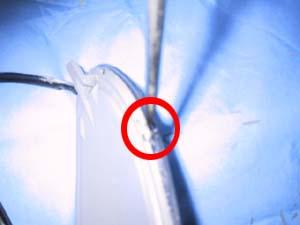 8. Continue separating the two plastic pieces using the flathead screwdriver. The separation of the glue may cause cracking sounds. Be careful not to crack the clear plastic piece. 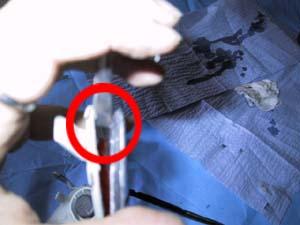 9. Using your fingers to keep pieces separated, use the pliers to get a hold of the amber piece inside. 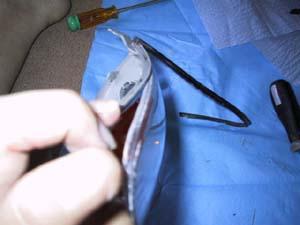 10. Remove the amber piece using the pliers. Be careful when removing it from it's attachment point inside the corner lamp. 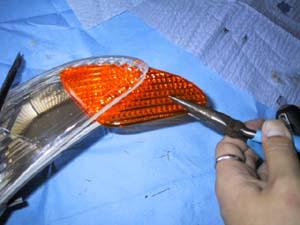 11. Seal the two pieces back together using a silicone caulk and let it dry for a few minutes. 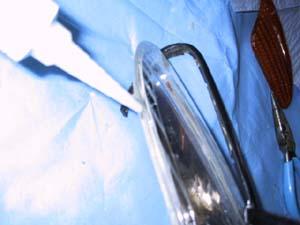 12. Reattach the rubber lining using the silicone caulk and let it dry for a few minutes. 13. Reattach the bulbs. 14. Reattach the corner lamps to the vehicle. 15. Replace the screws. 16. Enjoy! Steven Chung |


All pictures and graphics on this site, unless stated otherwise, are the property of Southern California Camry Club. Copyright 2001. All rights reserved. This site was created by MrRavenX at the Phoenix Knights Network.
